To repair roof shingles, start by conducting a thorough assessment of the damage, focusing on missing, curled, or cracked shingles. Gather essential tools such as a ladder, roofing nails, hammer, and utility knife. Ensure personal safety with a hard hat, non-slip work boots, gloves, and a safety harness. Carefully remove the damaged shingles using a pry bar and utility knife, then clean and prepare the roof surface. Install new shingles, ensuring correct alignment and secure nailing. Finally, inspect for proper placement and adherence. Regular maintenance can prevent future issues. For detailed steps and tips, explore the comprehensive guide.
Key Takeaways
- Conduct a visual inspection to identify damaged shingles and document findings.
- Gather necessary tools like a pry bar, roofing nails, hammer, and roofing cement.
- Ensure safety precautions, including using a safety harness, non-slip boots, and placing the ladder securely.
- Remove damaged shingles using a pry bar and utility knife and clean the roof surface.
- Install new shingles by positioning them correctly, maintaining a staggered pattern, and securing with proper nailing technique.
Assess Roof Damage

Before initiating any repairs, it is crucial to thoroughly assess the extent and nature of the roof damage to determine the appropriate course of action. Begin by conducting a visual inspection from ground level, using binoculars if necessary. Look for visible signs of damage such as missing, curled, or cracked shingles. Pay attention to areas around chimneys, vents, and skylights as these are common spots for leaks.
Next, if it is safe to do so, climb onto the roof for a closer inspection. Walk carefully and avoid stepping on damaged sections to prevent further harm. Inspect the underlayment and the flashing for any indications of water intrusion or deterioration. Check for granule loss, which can be identified by bald spots on the shingles or granules accumulating in gutters. Document all findings with photographs and notes.
This step is particularly helpful if you need to consult with a professional roofer or file an insurance claim. Understanding the severity and location of the damage will guide you in determining whether a simple repair is sufficient or if more extensive work, such as replacing entire sections of the roof, is necessary.
Gather Necessary Tools
To ensure a smooth and efficient repair process, assemble all the necessary tools and materials before starting any work on your roof. Having everything at hand will save time and reduce the risk of accidents caused by rushing or improvising. Begin by gathering essential tools such as a sturdy ladder, roofing nails, a hammer, roofing cement, and a utility knife. These are fundamental for removing damaged shingles and securing new ones in place. Additionally, have a pry bar available to gently lift and remove old shingles without causing further damage to the surrounding area.
A caulking gun filled with roofing sealant is crucial for sealing any gaps or cracks, ensuring a watertight finish. Make sure to have a measuring tape and chalk line to accurately align the new shingles, preserving the roof’s aesthetic and structural integrity. Moreover, consider wearing a tool belt to keep these items within easy reach, which can significantly improve efficiency and reduce trips up and down the ladder. Lastly, don’t forget to have replacement shingles that match the existing ones in both material and color, ensuring a seamless repair. With all these tools prepared, you’ll be well-equipped to tackle the shingle repair effectively.
Ensure Safety Precautions
Before beginning any roof repair, it’s crucial to prioritize safety. Start by wearing appropriate protective gear, such as gloves and non-slip shoes, to prevent injuries. Additionally, ensure your ladder is securely positioned and on stable ground to avoid accidents.
Wear Protective Gear
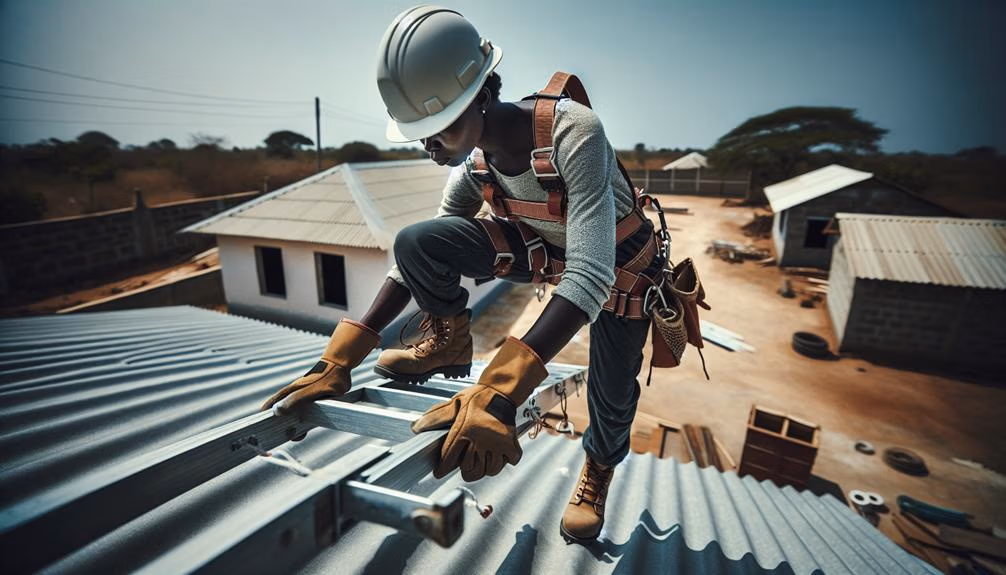
Ensuring your safety while repairing roof shingles begins with wearing appropriate protective gear. The first essential piece is a quality hard hat, which safeguards your head from unexpected impacts or falling debris. Equally important are non-slip work boots, providing the necessary traction to prevent slips and falls on the often-slippery roofing surface. Gloves are another crucial item. Opt for heavy-duty work gloves that offer both protection and dexterity, allowing you to handle tools and materials efficiently while shielding your hands from sharp shingle edges and nails.
Wearing a safety harness and a fall arrest system is non-negotiable, especially when working on steep or high roofs. This equipment can be lifesaving, securing you to an anchor point and reducing the risk of serious injury from falls. Additionally, eye protection, such as safety goggles, is vital to guard against dust, debris, and harmful UV rays. A long-sleeved shirt and durable pants will protect your skin from abrasions and sunburn.
Secure Ladder Properly
Once you are properly equipped with protective gear, the next step is to ensure your ladder is securely positioned to provide a stable and safe access point to the roof. Begin by selecting a ladder that extends at least three feet above the roof edge. This extra length will offer a secure handhold as you transition from the ladder to the roof surface. Place the base of the ladder on a firm, level ground. If the ground is uneven, use ladder levelers to stabilize it. Ensure the ladder’s feet are equipped with non-slip pads to prevent shifting. For additional security, anchor the top of the ladder to the roof or an adjacent structure using ladder stabilizers or tie-downs.
Observe the four-to-one rule: for every four feet of ladder height, the base should be one foot away from the wall. This angle prevents the ladder from tipping backward or sliding out at the base. Before climbing, double-check that all locks and braces are engaged. Lastly, always maintain three points of contact (two hands and one foot or two feet and one hand) on the ladder while ascending or descending. This practice significantly reduces the risk of falls, ensuring your safety during the shingle repair process.
Remove Damaged Shingles
Before you begin removing damaged shingles, ensure that you have taken the necessary safety precautions, such as wearing appropriate footwear and using a secure ladder. Gather all essential tools and materials, including a pry bar, hammer, roofing nails, and replacement shingles. With these preparations in place, you can proceed with confidence to remove the damaged shingles efficiently and safely.
Safety Precautions First
Proper safety precautions are paramount when removing damaged shingles to prevent accidents and ensure a smooth repair process. Before embarking on this task, it is vital to conduct a thorough safety assessment of the work area. Begin by checking the weather conditions; avoid working on the roof during rain, snow, or high winds, as these elements can create hazardous conditions.
Equip yourself with suitable safety gear. A sturdy pair of non-slip shoes is essential for maintaining traction on the roof. Additionally, wear a safety harness that is securely anchored to a stable part of the roof to prevent falls. Gloves and safety glasses will protect your hands and eyes from sharp edges and flying debris.
Plan your access to the roof carefully. Use a stable, well-positioned ladder and ensure it extends at least three feet above the roofline. Have a spotter at the base of the ladder to provide additional stability and assistance if needed. Clear the work area of any loose debris that could cause tripping hazards. By adhering to these safety precautions, you can confidently proceed with the task of removing damaged shingles, minimizing the risk of injury and ensuring a successful repair.
Necessary Tools and Materials
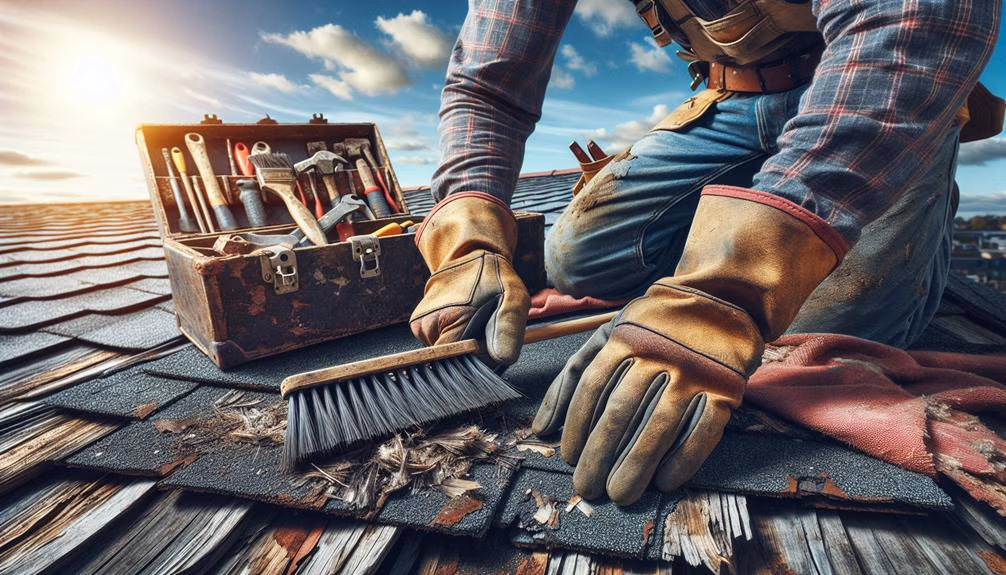
Gathering the right tools and materials is crucial for efficiently and effectively removing damaged shingles from your roof. To ensure a smooth and successful repair process, start by assembling a few essential items.
You will need a reliable roofing hammer or pry bar to lift and remove the damaged shingles. These tools will help you carefully detach the shingles without causing further damage to the surrounding area. A utility knife is another vital tool, useful for cutting shingles that may be stuck or difficult to remove. Make sure to have spare blades, as a sharp knife will make the task easier and safer. Additionally, a flathead screwdriver can come in handy for prying out nails or for those tight spots where a larger tool might not fit.
Protective gear is equally important. Ensure you have a sturdy ladder, non-slip shoes, and a safety harness to prevent falls. Gloves will protect your hands from sharp edges, while safety glasses shield your eyes from debris.
Lastly, have a bucket or a tarp to collect the debris. This will help keep your work area clean and minimize any potential mess. With these tools and materials at hand, you are well-prepared to tackle the task of removing damaged shingles efficiently.
Prepare Roof Surface
Ensuring a clean and stable roof surface is essential for the successful application of new shingles. Before proceeding with the installation, it is imperative to properly prepare the roof surface. This process not only ensures the durability of the new shingles but also prevents potential issues such as leaks and structural damage.
- Remove Old Shingles: Carefully strip away the damaged or old shingles from the area needing repair. Use a pry bar to lift the shingles and remove any nails. Ensure the underlying decking is exposed and free of debris.
- Inspect Roof Deck: Examine the decking for any signs of rot, damage, or weakness. If any sections appear compromised, they should be replaced to provide a solid foundation for the new shingles.
- Clean the Surface: Sweep away loose dirt, leaves, and other debris using a broom or brush. A clean surface ensures that the new shingles adhere properly and lay flat, contributing to the overall integrity of the roof.
- Apply Underlayment: Install a layer of roofing underlayment to provide an additional barrier against moisture. This step is crucial for enhancing the roof’s waterproofing capabilities and extending its lifespan.
Install New Shingles
How do you ensure the successful installation of new shingles on a well-prepared roof surface? Begin by selecting high-quality shingles that match the existing ones in material, size, and color. This ensures uniformity and durability.
Next, position the first shingle so that it aligns with the bottom edge of the roof and overlaps the edge by about 1/2 inch. This overhang protects the underlying structure from water damage. Continue placing shingles in a staggered pattern, which boosts the roof’s resistance to wind and water infiltration. Each new row should overlap the previous one by at least 5 inches.
Before securing the shingles, ensure they sit flat against the roof surface without any gaps or buckling. This prevents water from seeping underneath. Use a chalk line to maintain straight rows, which contributes to both the aesthetic and functional integrity of the roof.
Secure Shingles Properly
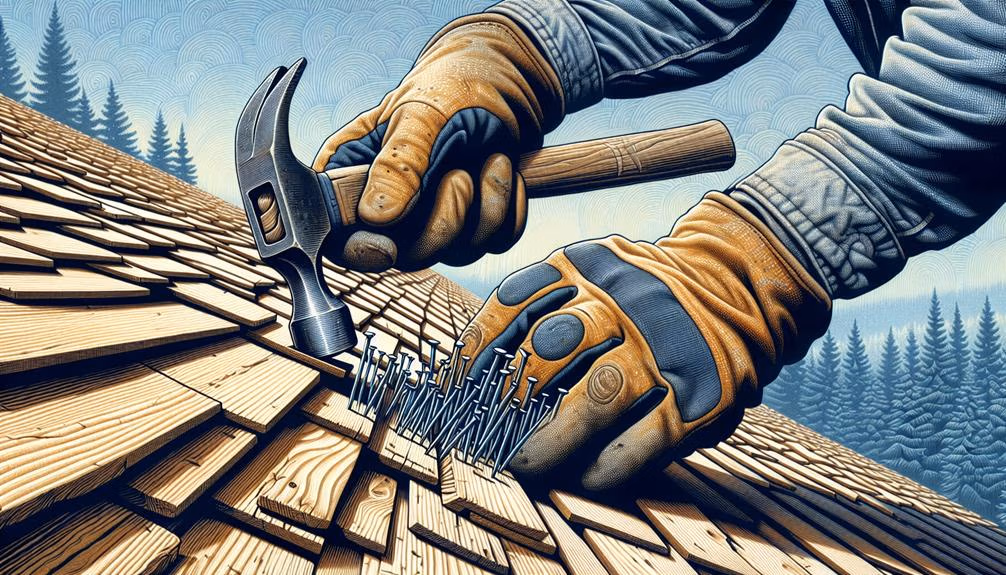
To secure shingles properly, use galvanized roofing nails, ensuring they penetrate at least 3/4 inch into the roof deck for optimal hold. This ensures that the shingles remain firmly attached even under adverse weather conditions. Here are the steps to follow:
- Nail Placement: Place nails approximately 1 inch above the cutout of the shingle. This location is critical for ensuring the shingle is secured without compromising its integrity.
- Nail Quantity: Use four nails per shingle as a standard practice. For areas with high wind exposure, consider using six nails per shingle to provide additional security.
- Nailing Technique: Drive the nails straight and flush with the shingle surface. Avoid overdriving nails, as this can damage the shingle and reduce its effectiveness.
- Sealing Tabs: Apply a small amount of roofing cement under the shingle tabs to aid in sealing them to the layer below. This extra step can help prevent wind uplift.
Inspect and Maintain
Regularly inspecting and maintaining your roof shingles is crucial to extending their lifespan and preventing costly repairs. Begin by conducting a visual inspection from the ground using binoculars. Look for signs of damage such as curling, cracking, or missing shingles. Pay special attention to areas around chimneys, vents, and skylights, as these are common places for leaks to develop.
Next, safely access the roof to perform a closer inspection. Check for accumulated debris, such as leaves and branches, which can trap moisture and cause shingles to deteriorate. Remove debris carefully to avoid damaging the shingles. Additionally, inspect the gutters and downspouts to ensure they are clear and functioning properly, as clogged gutters can lead to water backup and roof damage.
If you notice minor issues, address them promptly. Replace damaged shingles and apply roof sealant to minor cracks and leaks. For more extensive damage, it is advisable to consult a professional roofer to assess and repair the problem effectively.
Frequently Asked Questions
How Long Do Roof Shingle Repairs Typically Last?
The longevity of roof shingle repairs depends on various factors, including the quality of the materials used, the extent of the damage, and the skill of the repair work. Typically, well-executed shingle repairs can last between 10 to 20 years. Regular maintenance and timely inspections can further extend the lifespan of these repairs, ensuring your roof remains in optimal condition for a longer period.
Can Roof Shingle Repairs Be Done in Winter?
Yes, roof shingle repairs can be performed in winter, although it presents additional challenges. Cold temperatures can make shingles brittle, increasing the risk of breakage. Moreover, adhesives may take longer to cure. It’s advisable to choose a day with milder temperatures and ensure proper safety measures against ice and snow. Consulting a professional for winter repairs can ensure the job is done correctly and safely.
What Type of Shingles Are Best for My Climate?
When selecting shingles for your climate, it is crucial to consider factors such as temperature extremes, humidity, and precipitation. Asphalt shingles are versatile and perform well in varied climates, while metal shingles are excellent for areas with heavy snowfall due to their durability. For hot climates, consider reflective or cool roofing shingles to minimize heat absorption. In regions prone to high winds, opt for impact-resistant shingles for enhanced durability.
How Can I Match New Shingles to My Existing Roof Color?
How can one ensure new shingles match the existing roof color? Start by obtaining a sample shingle from your roof and take it to a local home improvement store for a precise match. Consider the age and wear of your current shingles; newer shingles may appear different due to fading. Finally, consult with a roofing professional who can provide expert advice and potentially source the closest match for a seamless blend.
Are There Any Special Considerations for Repairing Older Roofs?
When repairing older roofs, it is crucial to assess the overall condition of the underlying structure for rot or damage, as older materials can be more fragile. Ensure that replacement shingles match the existing ones in both material and color to maintain aesthetic continuity. Additionally, consider consulting a roofing professional to verify that the roof’s integrity is uncompromised, ensuring that repairs are effective and long-lasting.
Conclusion
Restoring roof shingles is akin to piecing together a protective quilt, each step vital for the integrity of the whole. Assessing damage, gathering tools, ensuring safety, and removing damaged sections are the initial stitches. Preparing the surface and installing new shingles weave the fabric back together, while securing them properly ensures durability. Regular inspection and maintenance act as the final threads, fortifying the roof against future wear. This methodical approach creates a resilient, well-guarded shelter.