Preparing your roof for winter requires careful attention and timely action. One year, I eagerly ignored missing shingles and ended up with costly leaks. Inspect for damage like sagging areas or cracked shingles. Clean gutters thoroughly; I still remember the rainy day I spent removing leaves with gloves and a scoop, ensuring clear drainage. Trim overhanging branches to prevent damage and ice dams—pruning back to the main trunk enhances sunlight exposure. Don't forget attic insulation; it keeps your home cozy and energy-efficient. Also, repairing flashing early on can prevent leaks. Dive into these steps for a safe, comfortable winter ahead.
Key Takeaways
- Inspect for missing shingles, sagging areas, and damaged flashing to address issues promptly.
- Clean gutters and downspouts to prevent ice dams and water damage.
- Trim overhanging branches to prevent roof damage and enhance sunlight exposure.
- Upgrade attic insulation and seal roof vents to improve energy efficiency.
- Consider installing gutter guards to reduce maintenance and prevent clogs.
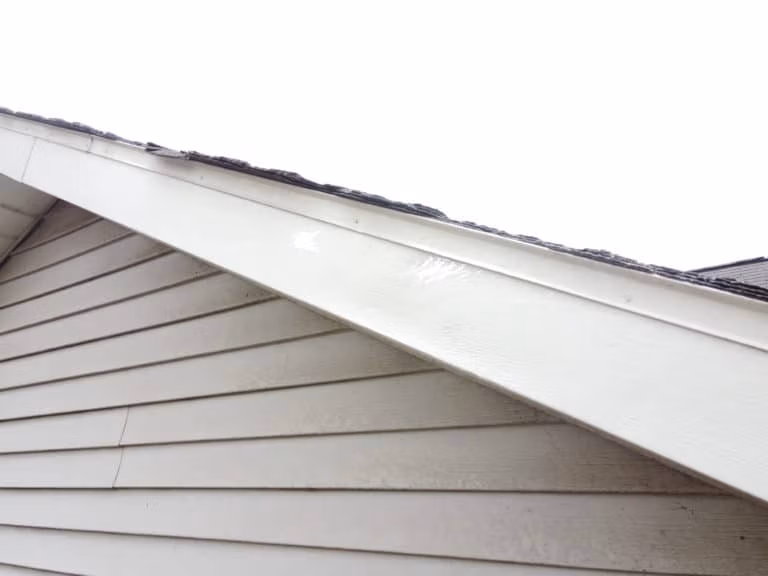
Inspect for Damage

As the winter months approach, it's crucial to thoroughly inspect your roof for any signs of damage that could worsen under harsh weather conditions. I remember one winter when I overlooked this vital step, and a minor leak turned into a major issue, causing water damage to my attic and insulation. This costly mistake taught me the importance of a pre-winter roof inspection.
Start by examining your roof from the ground using binoculars to spot any obvious issues like missing shingles, sagging areas, or damaged flashing around chimneys and vents. If you feel comfortable, carefully climb up to check for less visible problems like cracked or curled shingles. Pay extra attention to valleys and areas around skylights, as these are more prone to leaks.
If you find any damage, address it promptly. Small repairs now can prevent larger, more expensive problems later. For instance, replacing a few shingles or sealing a minor crack can fortify your roof against heavy snow and ice. If you're unsure about the extent of the damage or how to fix it, consider hiring a professional to ensure your roof is winter-ready. This proactive approach can save you from a winter of stress and costly repairs.
Clean Gutters
Last winter, I remember the frustration of dealing with ice dams, which could have been prevented by simply cleaning the gutters. Removing leaves and debris ensures that water flows freely, reducing the risk of blockages. By checking for obstructions and ensuring proper drainage, you'll protect your roof and home from potential water damage as the cold season approaches.
Remove Leaves Debris
One crisp autumn morning, I realized the importance of regularly cleaning out the gutters when a cascade of leaves and debris nearly turned our cozy home into a winter flood zone. As I watched the water pour over the sides of the clogged gutters, I understood the crucial role they play in protecting our home from the elements.
To prevent such scenarios, it is essential to remove leaves and debris from your gutters before winter sets in. This simple yet effective task can save homeowners from the potential headaches and expenses associated with water damage and roof deterioration. Begin by donning a pair of sturdy gloves and using a small, plastic scoop to remove the accumulated leaves and debris. A bucket or tarp can be handy to collect the waste and prevent further mess.
Additionally, employing a garden hose to flush out remaining particles ensures that the gutters are clear and functioning properly. It's also wise to inspect for any signs of rust, sagging, or damage that may necessitate repairs. By dedicating a few hours to this preventive measure, you secure the integrity of your home's roof and foundation, ensuring a safer, more resilient structure against winter's harsh forces.
Check for Blockages
Recognizing the potential for blockages in your gutters is not only a practical step but also a necessary one to safeguard your home from winter's harshest conditions. I remember one particularly brutal winter when I neglected this vital task. Snow and ice accumulated, leading to overflowing gutters and a cascade of water that seeped into the foundation. The damage was extensive and costly to repair.
Ensuring your gutters are clean before winter sets in can prevent such disasters. Begin by donning a pair of sturdy gloves and removing any leaves, twigs, or debris that have accumulated. A small trowel can be particularly useful for this task. Then, use a garden hose to flush out any remaining particles, ensuring that water flows freely through the downspouts. This step is crucial as it simulates the conditions your gutters will face during winter rains and melting snow.
Additionally, pay close attention to the downspouts. If water doesn't drain properly, it can freeze and create ice dams, leading to water damage in your roof and attic. Regular maintenance not only protects your home but also provides peace of mind, allowing you to enjoy the winter season without worry.
Ensure Proper Drainage
After ensuring your gutters are free from blockages, it's important to focus on maintaining proper drainage to prevent winter woes. Last winter, I saw firsthand the damage improper drainage can cause when a friend's home suffered significant water damage due to clogged gutters. The heavy snow melted rapidly, and with nowhere to go, the water overflowed, seeping into the walls and foundation.
To avoid such devastating scenarios, ensure your downspouts direct water at least three feet away from your home's foundation. Extending the downspouts using flexible pipe extensions or splash blocks can help achieve this. Regularly inspect your gutters and downspouts for leaks or separations that could hinder water flow.
Additionally, consider installing gutter guards. These screens or covers can prevent leaves and debris from accumulating, ensuring a steady flow of water even during heavy snowfall or rain. It's a small investment that can save you from costly repairs and the emotional stress of dealing with water damage.
Lastly, always check the slope of your gutters. They should tilt slightly towards the downspouts to facilitate effective drainage. A professional can help adjust the pitch if needed, ensuring your home is winter-ready.
Trim Overhanging Branches
I remember the winter two years ago when a heavy branch crashed onto my roof, causing significant damage and stress. By trimming overhanging branches, you can prevent such incidents and also allow more sunlight to reach and melt the snow, reducing the risk of ice dams. Taking this precaution not only protects your home but also brings peace of mind during harsh winter months.
Prevent Roof Damage
Trimming overhanging branches is a crucial step in preventing roof damage, as it minimizes the risk of falling limbs during winter storms. I recall a particularly harsh winter a few years back when my neighbor's large oak tree shed a massive branch onto his roof, causing significant damage. The experience taught me the importance of proactive maintenance to avoid such unfortunate incidents.
Here are some detailed steps to consider:
- Identify Risky Branches: Walk around your property and identify branches that extend over your roof. These are potential hazards, especially those that appear weakened or dead. A professional arborist can provide an expert assessment if you're unsure.
- Prune Safely: Using appropriate tools and safety gear, carefully trim the branches. It's critical to cut branches back to the main trunk or a sturdy lateral branch to ensure healthy regrowth. Avoid over-pruning, as this can stress the tree and lead to further issues.
- Dispose of Debris: Once pruning is complete, promptly remove the cut branches and leaves from your property. Accumulated debris can become a slip hazard and attract pests, creating additional problems.
Enhance Sunlight Exposure
While preventing roof damage is paramount, another significant benefit of trimming overhanging branches is enhancing sunlight exposure to your home. I recall one winter when my living room, usually bathed in warm, natural light, became a dim, cold space. My neighbor suggested trimming the branches that had grown over the roof, casting long shadows and blocking precious sunlight.
Not only did this simple task restore the inviting ambiance of my home, but it also had practical benefits. Sunlight can help melt snow and ice on the roof, reducing the risk of ice dams and subsequent water damage. It also prevents mold and algae growth, as these thrive in dark, damp environments. By allowing more sunlight to reach your roof, you create a natural deterrent against these issues.
Moreover, enhanced sunlight exposure can improve energy efficiency. Natural light reduces the need for artificial lighting, lowering your energy bills. In the long run, this can lead to significant savings. Trimming overhanging branches is a straightforward, yet impactful, step in winterizing your roof and home, one that combines comfort, safety, and efficiency in a single, thoughtful action.
Check Attic Insulation
Regularly inspecting the attic insulation is crucial to ensuring your home remains energy-efficient and comfortable throughout the winter months. I remember last winter when our heating bills soared unexpectedly. After some investigation, I discovered that the attic insulation had deteriorated, allowing precious warmth to escape.
To prevent such issues, follow these steps:
- Assess Insulation Thickness: Measure the depth of your current insulation. The U.S. Department of Energy recommends at least 12-15 inches of insulation for optimal energy efficiency. Insufficient insulation can lead to significant heat loss, causing both discomfort and increased energy costs.
- Look for Gaps and Damage: Over time, insulation can shift or become damaged. Carefully inspect for any gaps, compressed areas, or signs of water damage. Even small gaps can drastically reduce insulation effectiveness, making your home susceptible to cold drafts.
- Upgrade Insulation if Necessary: If you find that your insulation is insufficient or damaged, consider upgrading. Modern materials like spray foam or fiberglass batts offer superior thermal performance. I opted for a spray foam upgrade last year, and it made a noticeable difference in both comfort and energy savings.
Addressing these key areas can help ensure that your attic insulation is up to par, keeping your home cozy and efficient all winter long.
Install Gutter Guards

As the leaves begin to fall, one of the most effective measures I took to protect my home from winter water damage was installing gutter guards. Last autumn, I noticed that my gutters were constantly clogged with leaves and debris, causing water to overflow and create icy hazards around my home. The sheer volume of maintenance was overwhelming, and I knew a better solution was needed.
Investing in quality gutter guards proved to be a game-changer. These guards act as a barrier, preventing leaves, twigs, and other debris from entering the gutters while allowing rainwater to flow freely. This simple installation dramatically reduced the frequency of gutter cleanings, saving me time and reducing the risk of winter-related water damage.
The emotional relief was significant, as I no longer had to worry about the potential for ice dams forming due to clogged gutters. Instead, I could focus on enjoying the coziness of the season. In addition, the guards help maintain the structural integrity of my home by ensuring proper drainage, which is crucial for preventing leaks and water damage. Overall, installing gutter guards was a smart, proactive step in my winter roof preparation.
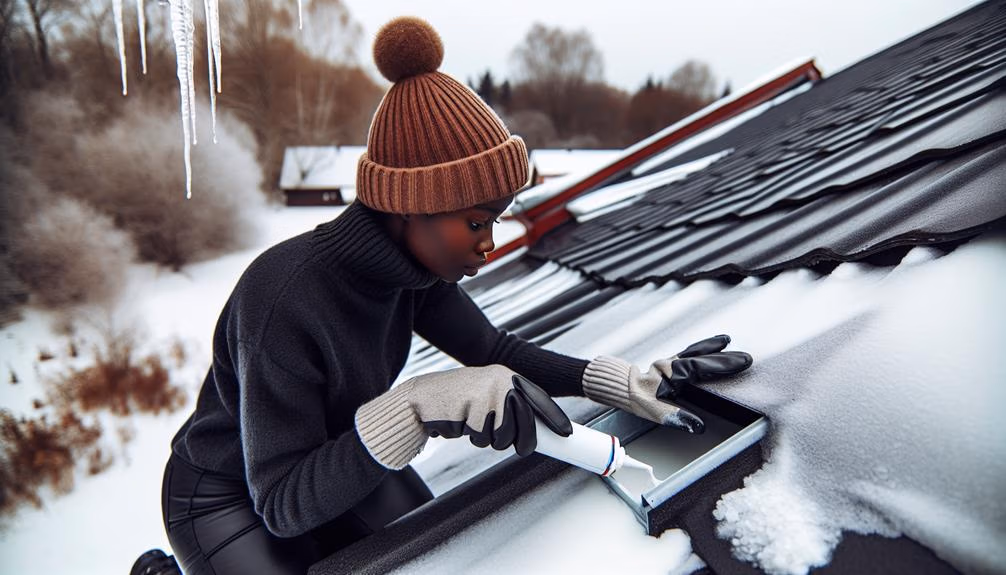
Repair Flashing
Repairing the flashing around chimneys, skylights, and vent pipes became a critical task after I discovered minor leaks during the first frost of last winter. Those small leaks quickly evolved into significant problems, causing water damage and expensive repairs. The experience taught me the importance of ensuring the flashing is in top condition before the harsh winter weather sets in.
To repair flashing effectively, follow these steps:
- Inspect the Flashing: Begin by closely examining the flashing for any signs of rust, cracks, or gaps. Pay special attention to areas where different materials meet, as these are common spots for leaks. Use a flashlight to ensure no damage goes unnoticed.
- Clean the Area: Before applying any repairs, the area around the flashing must be clean. Remove any debris, old sealant, or dirt. This step ensures a strong bond between the flashing and the roof material, enhancing the effectiveness of your repairs.
- Apply Sealant or Replace Flashing: If minor damage is found, a high-quality roof sealant can be used to patch small cracks and gaps. For more extensive damage, consider replacing the flashing entirely. Ensure all edges are sealed properly to prevent future leaks.
Seal Roof Vents
One winter evening, I noticed a draft seeping through the attic, which led me to realize the importance of properly sealing roof vents to maintain a warm and energy-efficient home. As I climbed up to inspect, the cold air biting at my fingertips, I found gaps around the vent pipes and exhaust fans. These unsealed areas were little gateways for the winter chill to invade our cozy sanctuary.
To tackle this, I gathered high-quality roofing sealant and a caulking gun. Carefully, I applied a generous bead of sealant around the base of each vent, ensuring complete coverage. The process required patience and precision, but the reward was immediate. The once-persistent draft vanished, replaced by a comforting warmth that spread throughout the house.
Sealing roof vents is about more than just comfort; it also helps reduce energy bills by preventing heat loss. Moreover, it shields the attic from moisture intrusion, which can lead to mold growth and structural damage. By taking the time to seal these critical areas, I not only safeguarded my family's comfort but also enhanced the durability and efficiency of our home.
Test Roof Drainage
With the roof vents now properly sealed, my attention turned to ensuring our roof's drainage system was up to the task of handling winter's relentless precipitation. It's something I learned the hard way last winter when a clogged gutter turned into an ice dam, causing water to back up under the shingles. Determined not to repeat that mistake, I decided to tackle the drainage system.
First, I climbed up to inspect the gutters for any debris. Leaves, twigs, and even the occasional bird's nest can obstruct water flow. I used a sturdy ladder and carefully cleaned out each section, feeling a sense of accomplishment with every scoop.
Secondly, I turned my focus to the downspouts. I ran a hose through them to ensure they were clear, watching the water flow freely and reassured that any blockages had been removed.
Lastly, I checked for any signs of wear or damage. Rusty spots and loose fittings can compromise the system when it matters most.
- Inspect and clean gutters: Remove all debris to prevent clogs.
- Clear downspouts: Flush with water to ensure unobstructed drainage.
- Check for damage: Repair or replace any compromised sections.
Schedule Professional Inspection

Recognizing the limitations of my own expertise, I knew it was essential to schedule a professional inspection to catch any potential issues that I might have missed. Having grown up in a family where we fixed things ourselves, it was humbling to admit that some tasks require the trained eye of an expert. The decision was driven by a deep-seated fear of overlooking a minor crack that could escalate into a costly disaster during winter.
I scheduled an appointment with a reputable roofing contractor. The inspector arrived with specialized tools and a comprehensive checklist that immediately put me at ease. He meticulously examined every nook and cranny—areas I wouldn't have thought to check.
His findings were eye-opening. He discovered loose shingles and minor leaks that I had completely overlooked. The detailed report he provided, complete with photographs, made it clear that professional inspections are not just a recommendation but a necessity.
Frequently Asked Questions
How Can I Prevent Ice Dams on My Roof?
Preventing ice dams on your roof involves ensuring proper insulation and ventilation. In my experience, adding extra insulation in the attic helps maintain a consistent roof temperature. Additionally, installing soffit and ridge vents improves airflow, which reduces the chances of ice formation. Regularly clearing gutters and downspouts also helps by ensuring that melting snow can drain efficiently, preventing the water from refreezing at the roof's edge.
What Materials Are Best for Winter Roof Protection?
Choosing the right materials for winter roof protection is essential. High-quality asphalt shingles are a popular choice due to their durability and weather resistance. Metal roofing is another excellent option, offering superior strength and longevity. Additionally, consider installing underlayment materials like waterproof membrane to prevent leaks. Proper insulation and ventilation also play crucial roles in maintaining roof integrity during harsh winter conditions. These measures ensure your roof withstands seasonal challenges effectively.
How Often Should Roof Maintenance Be Done in Winter?
Winter roof maintenance is absolutely crucial; neglecting it can lead to catastrophic damage! Personally, I remember a winter when I skipped a single inspection and ended up with a leaking ceiling. Experts generally recommend inspecting your roof once a month during winter. This frequency allows you to catch small issues before they escalate into major problems, ensuring your home remains a warm sanctuary throughout the cold season.
Are Roof Heating Cables Effective in Preventing Ice Buildup?
Roof heating cables can be effective in preventing ice buildup, especially in regions prone to harsh winter conditions. These cables work by maintaining a consistent temperature along the roofline, preventing the formation of ice dams. However, their effectiveness depends on proper installation and regular maintenance. While not a complete solution, they can be a valuable component of a comprehensive winter roof care strategy.
What Are the Signs of Snow Load Stress on a Roof?
Signs of snow load stress on a roof include visible sagging or bending of the roof structure, unusual creaking or popping sounds, and interior leaks or cracks in walls and ceilings. Additionally, doors and windows may become difficult to open or close due to structural shifts. Promptly addressing these signs is crucial to prevent further damage and ensure the safety of the building's occupants.
Conclusion
In summary, preparing a roof for winter involves an array of meticulous tasks, from inspecting for damage to sealing roof vents. Each step promises the homeowner a season free from leaks and drafts, ensuring that winter's icy fingers remain outside. However, one must wonder if roofs secretly relish the annual attention, basking in the limelight of human diligence. Thus, winter preparation is less a chore and more a curious dance of human toil and architectural pride.